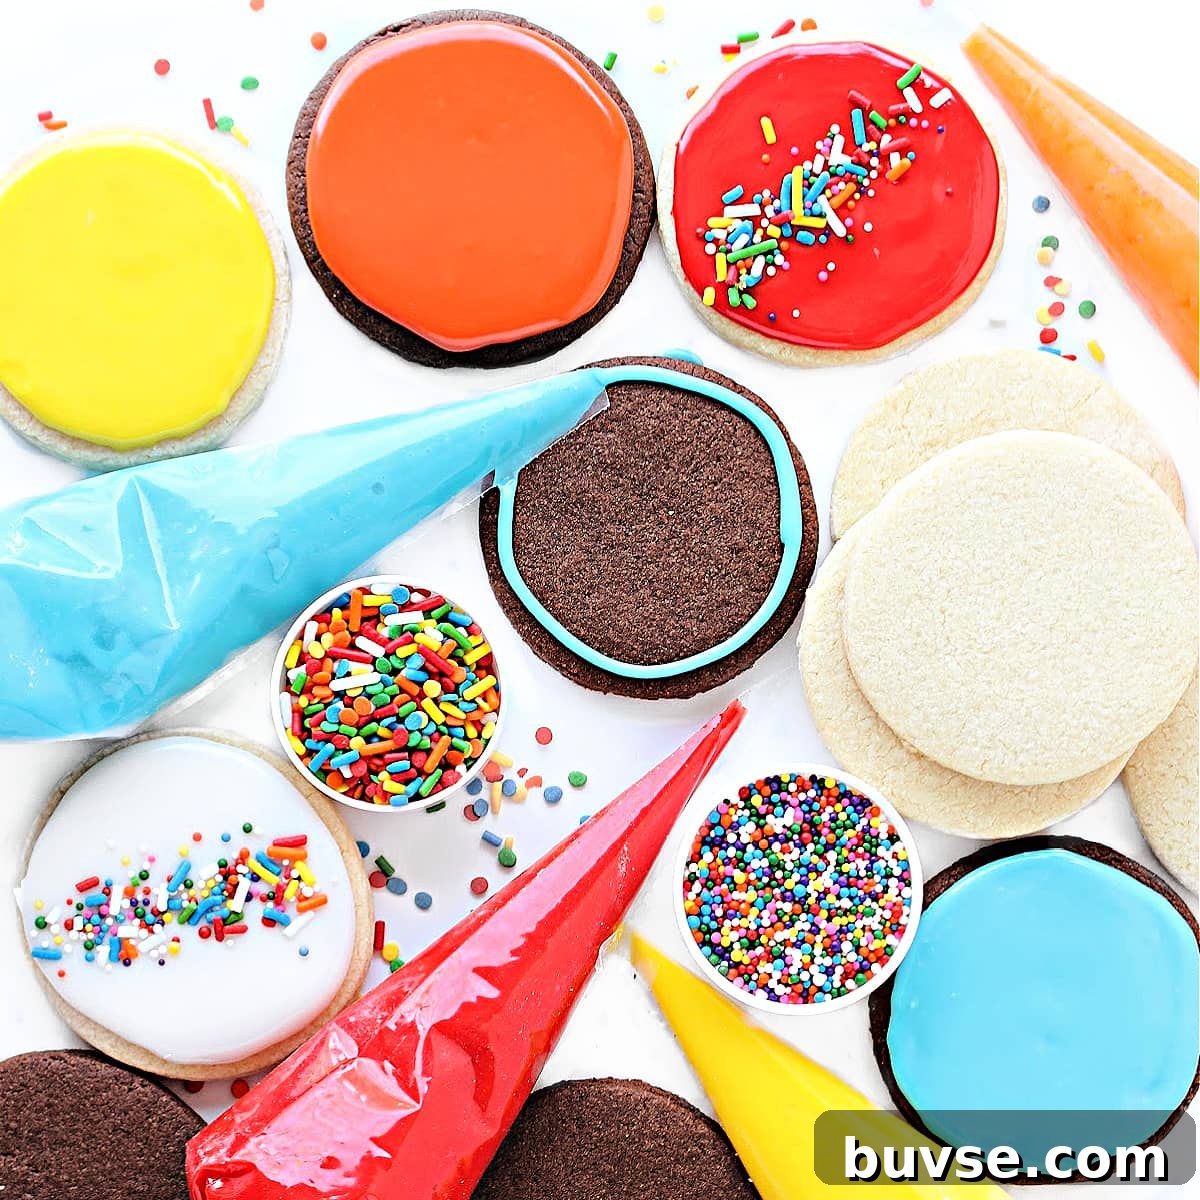
This glaze icing recipe creates a delicious decorating icing for cookies that’s quick to make and easy to use. It dries firm enough for stacking while keeping a soft, slightly chewy bite—perfect for gifting, care packages, or everyday treats.
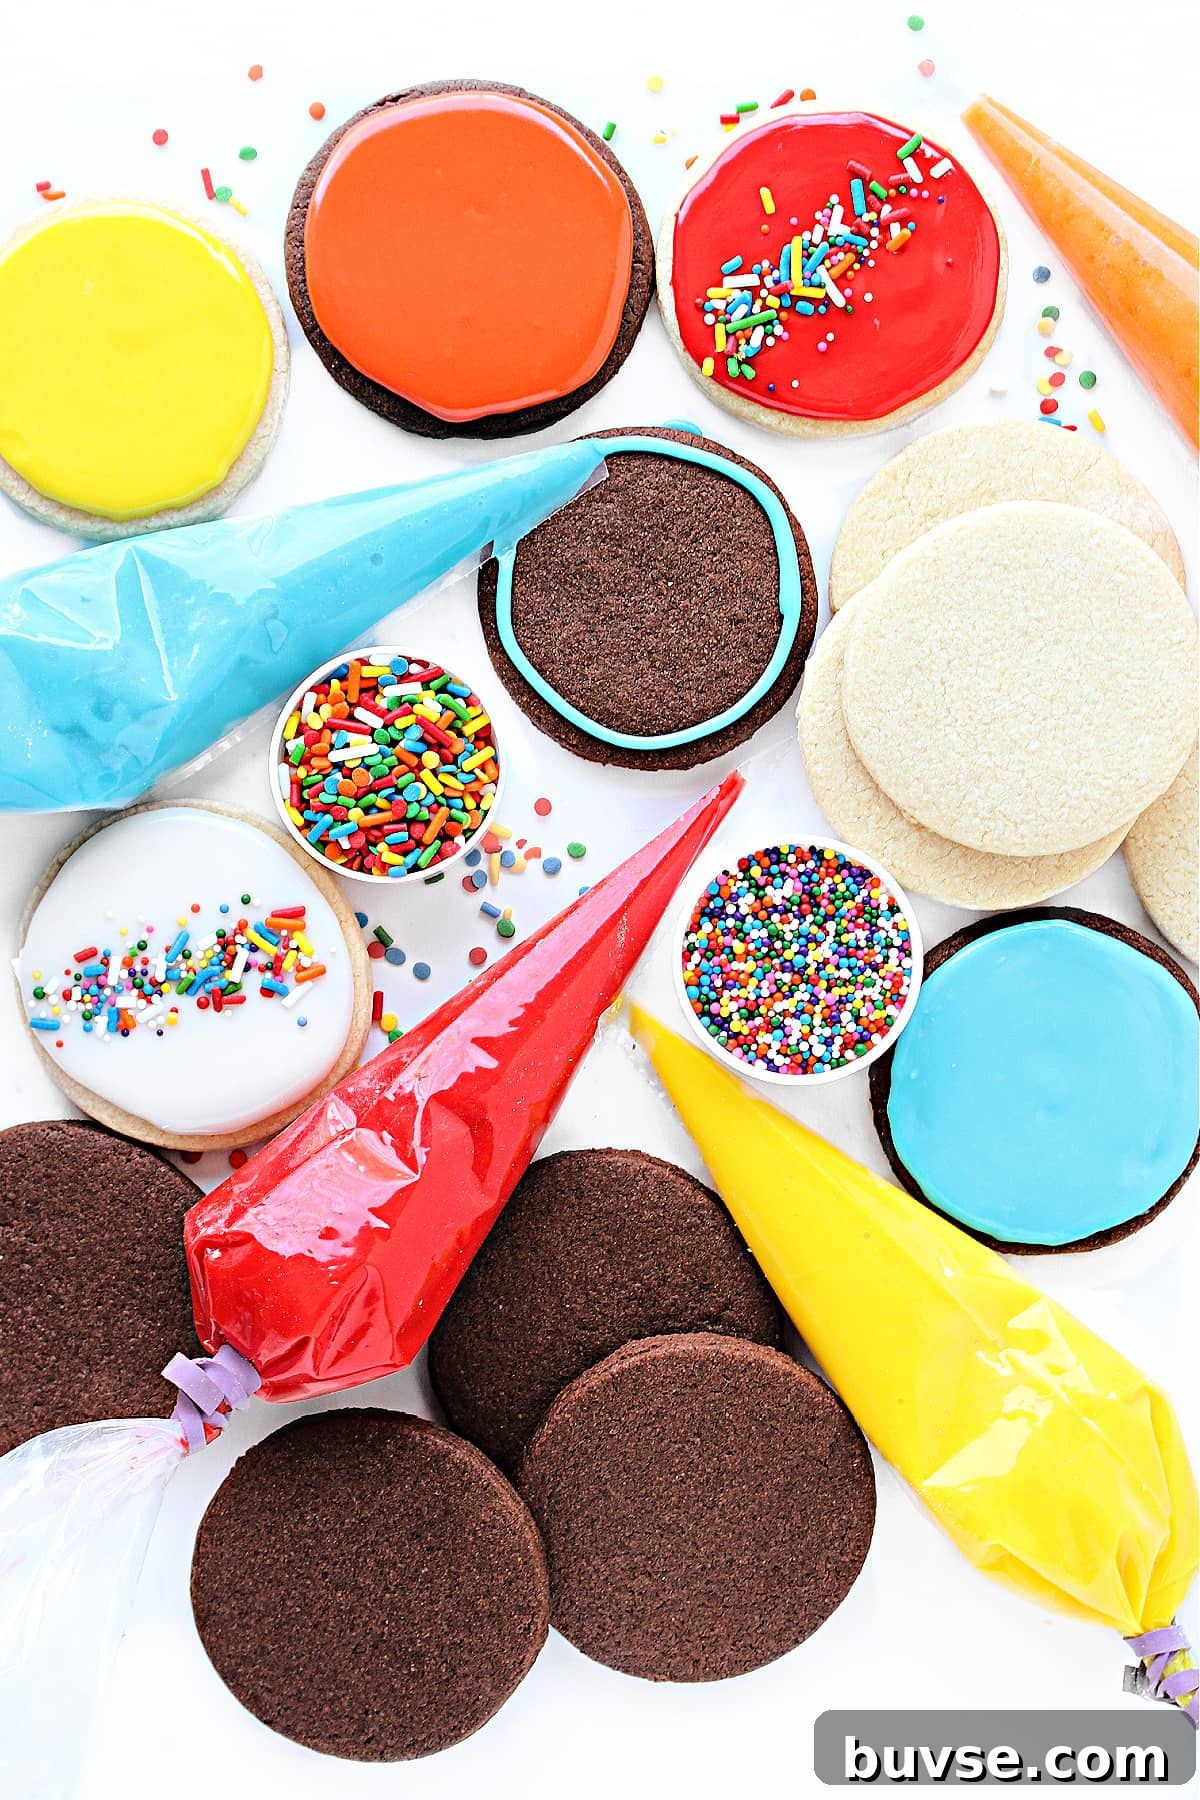
Table of contents
- Why you’ll love this recipe
- Ingredients
- Instructions
- Storage
- Tips
- How to use glaze icing for easy cookie decorating
- Marbled design
- Tie dye design
- Flower design
- Frequently asked questions
- Related Recipes
Why you’ll love this recipe
- Glaze icing delivers professional-looking decorated cookies using simple, pantry-friendly ingredients and no special equipment.
- No mixer is required—this is a one-bowl recipe you can whisk by hand.
- Iced sugar cookies retain moisture and stay fresher longer than undecorated cookies.
Glaze icing comes together quickly and can be used for everything from basic flooding to playful designs. It’s forgiving for beginners but versatile enough for more detailed work. Children can easily help create colorful cookies with just piping bags (or zip-top bags) and a toothpick.
Decorated cookies suit any season—adjust shapes, colors, and flavors to match holidays or celebrations. These iced sugar cookies are a favorite to include in care packages and gift boxes because they travel well and look cheerful.
Ingredients
Below is an overview of the ingredients. Full measurements and the step-by-step instructions are included further down in the recipe card.
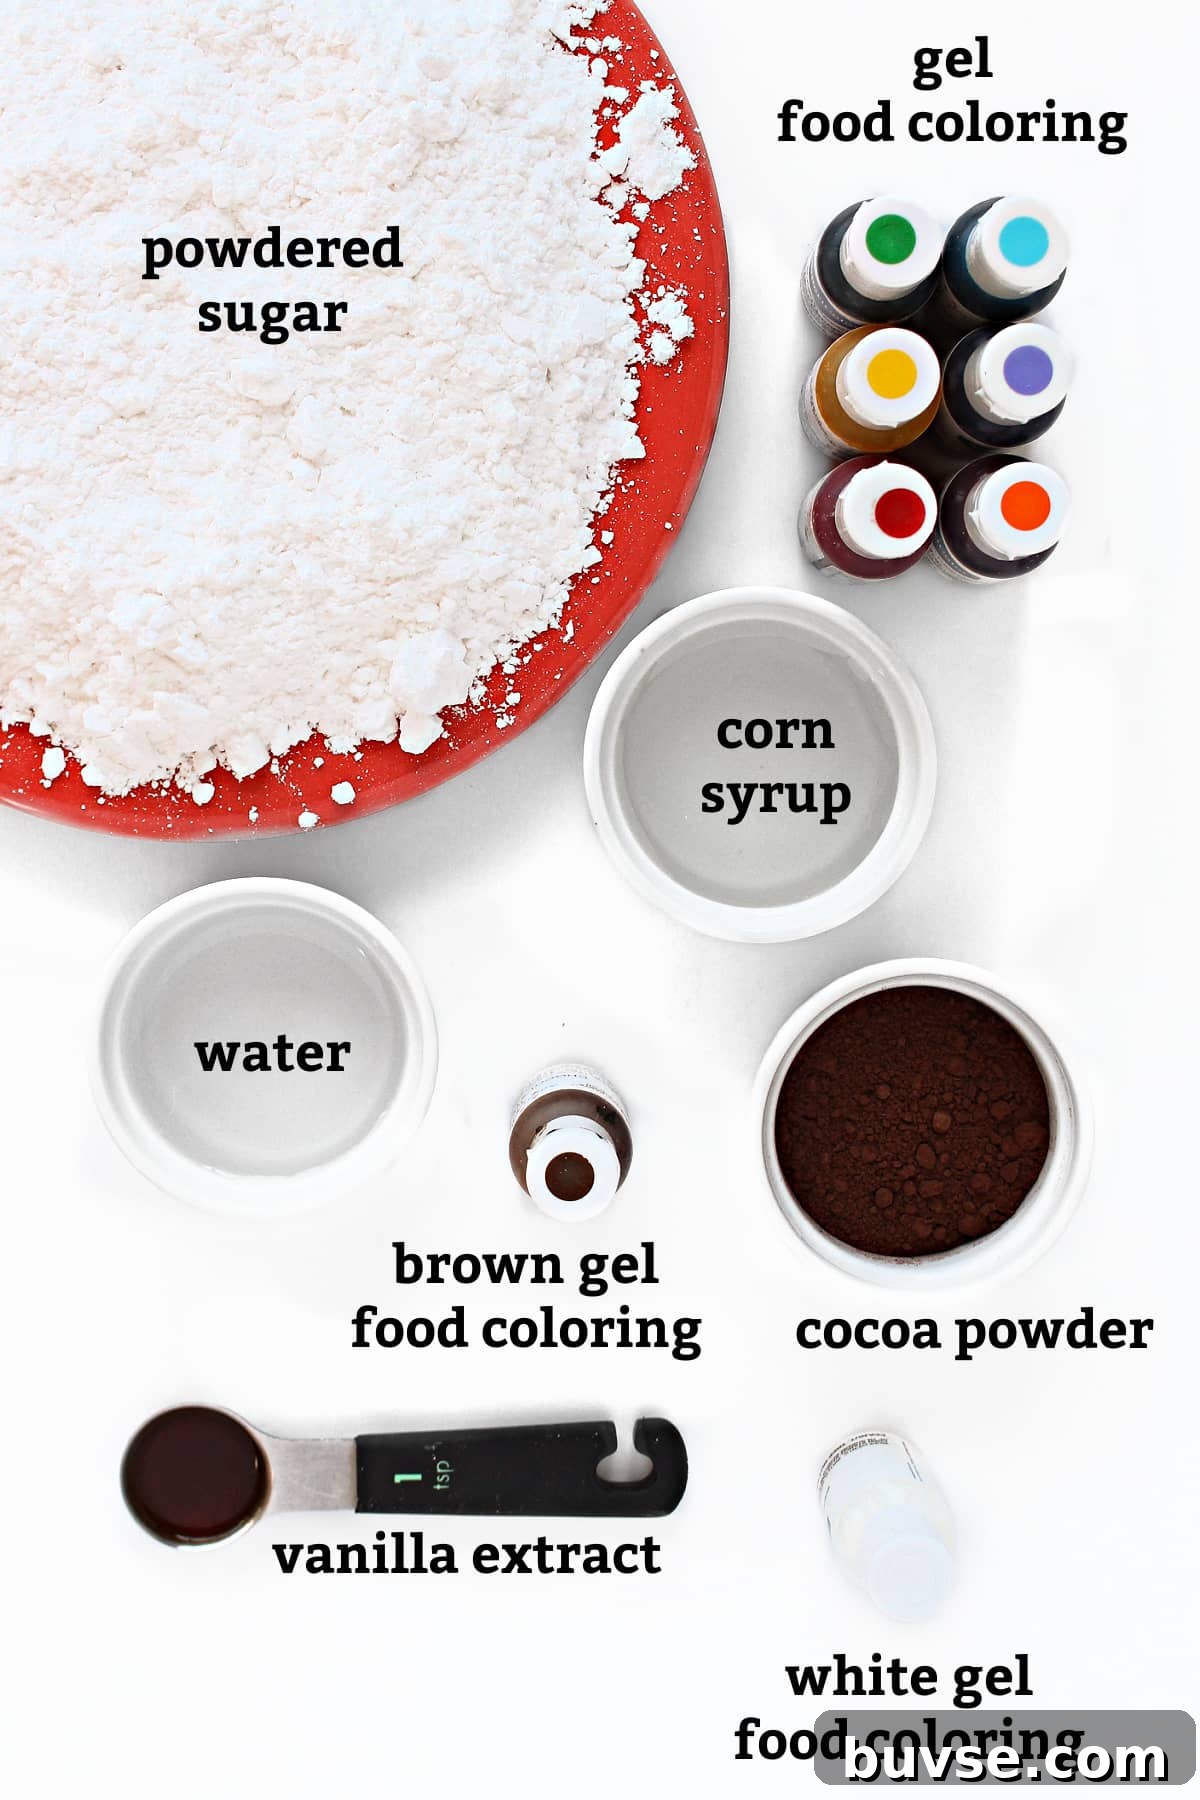
- Confectioners’ (powdered) sugar — the base for smooth, shiny glaze.
- Water — added gradually to reach the right consistency; can be replaced with milk or juice for added flavor.
- Light corn syrup — gives the icing a glossy finish and helps it set with a slightly chewy texture.
- Vanilla extract — or substitute one teaspoon of another extract for different flavors. To keep icing very white, use a clear imitation vanilla.
- Gel food coloring — concentrated gel color gives deeper shades without thinning the icing. White gel color is optional to make the icing more opaque.
- For chocolate glaze: cocoa powder and a touch of brown gel color for a richer, darker tone.
Instructions
This summary covers the main steps. Detailed steps and measurements are included in the printable recipe card below.
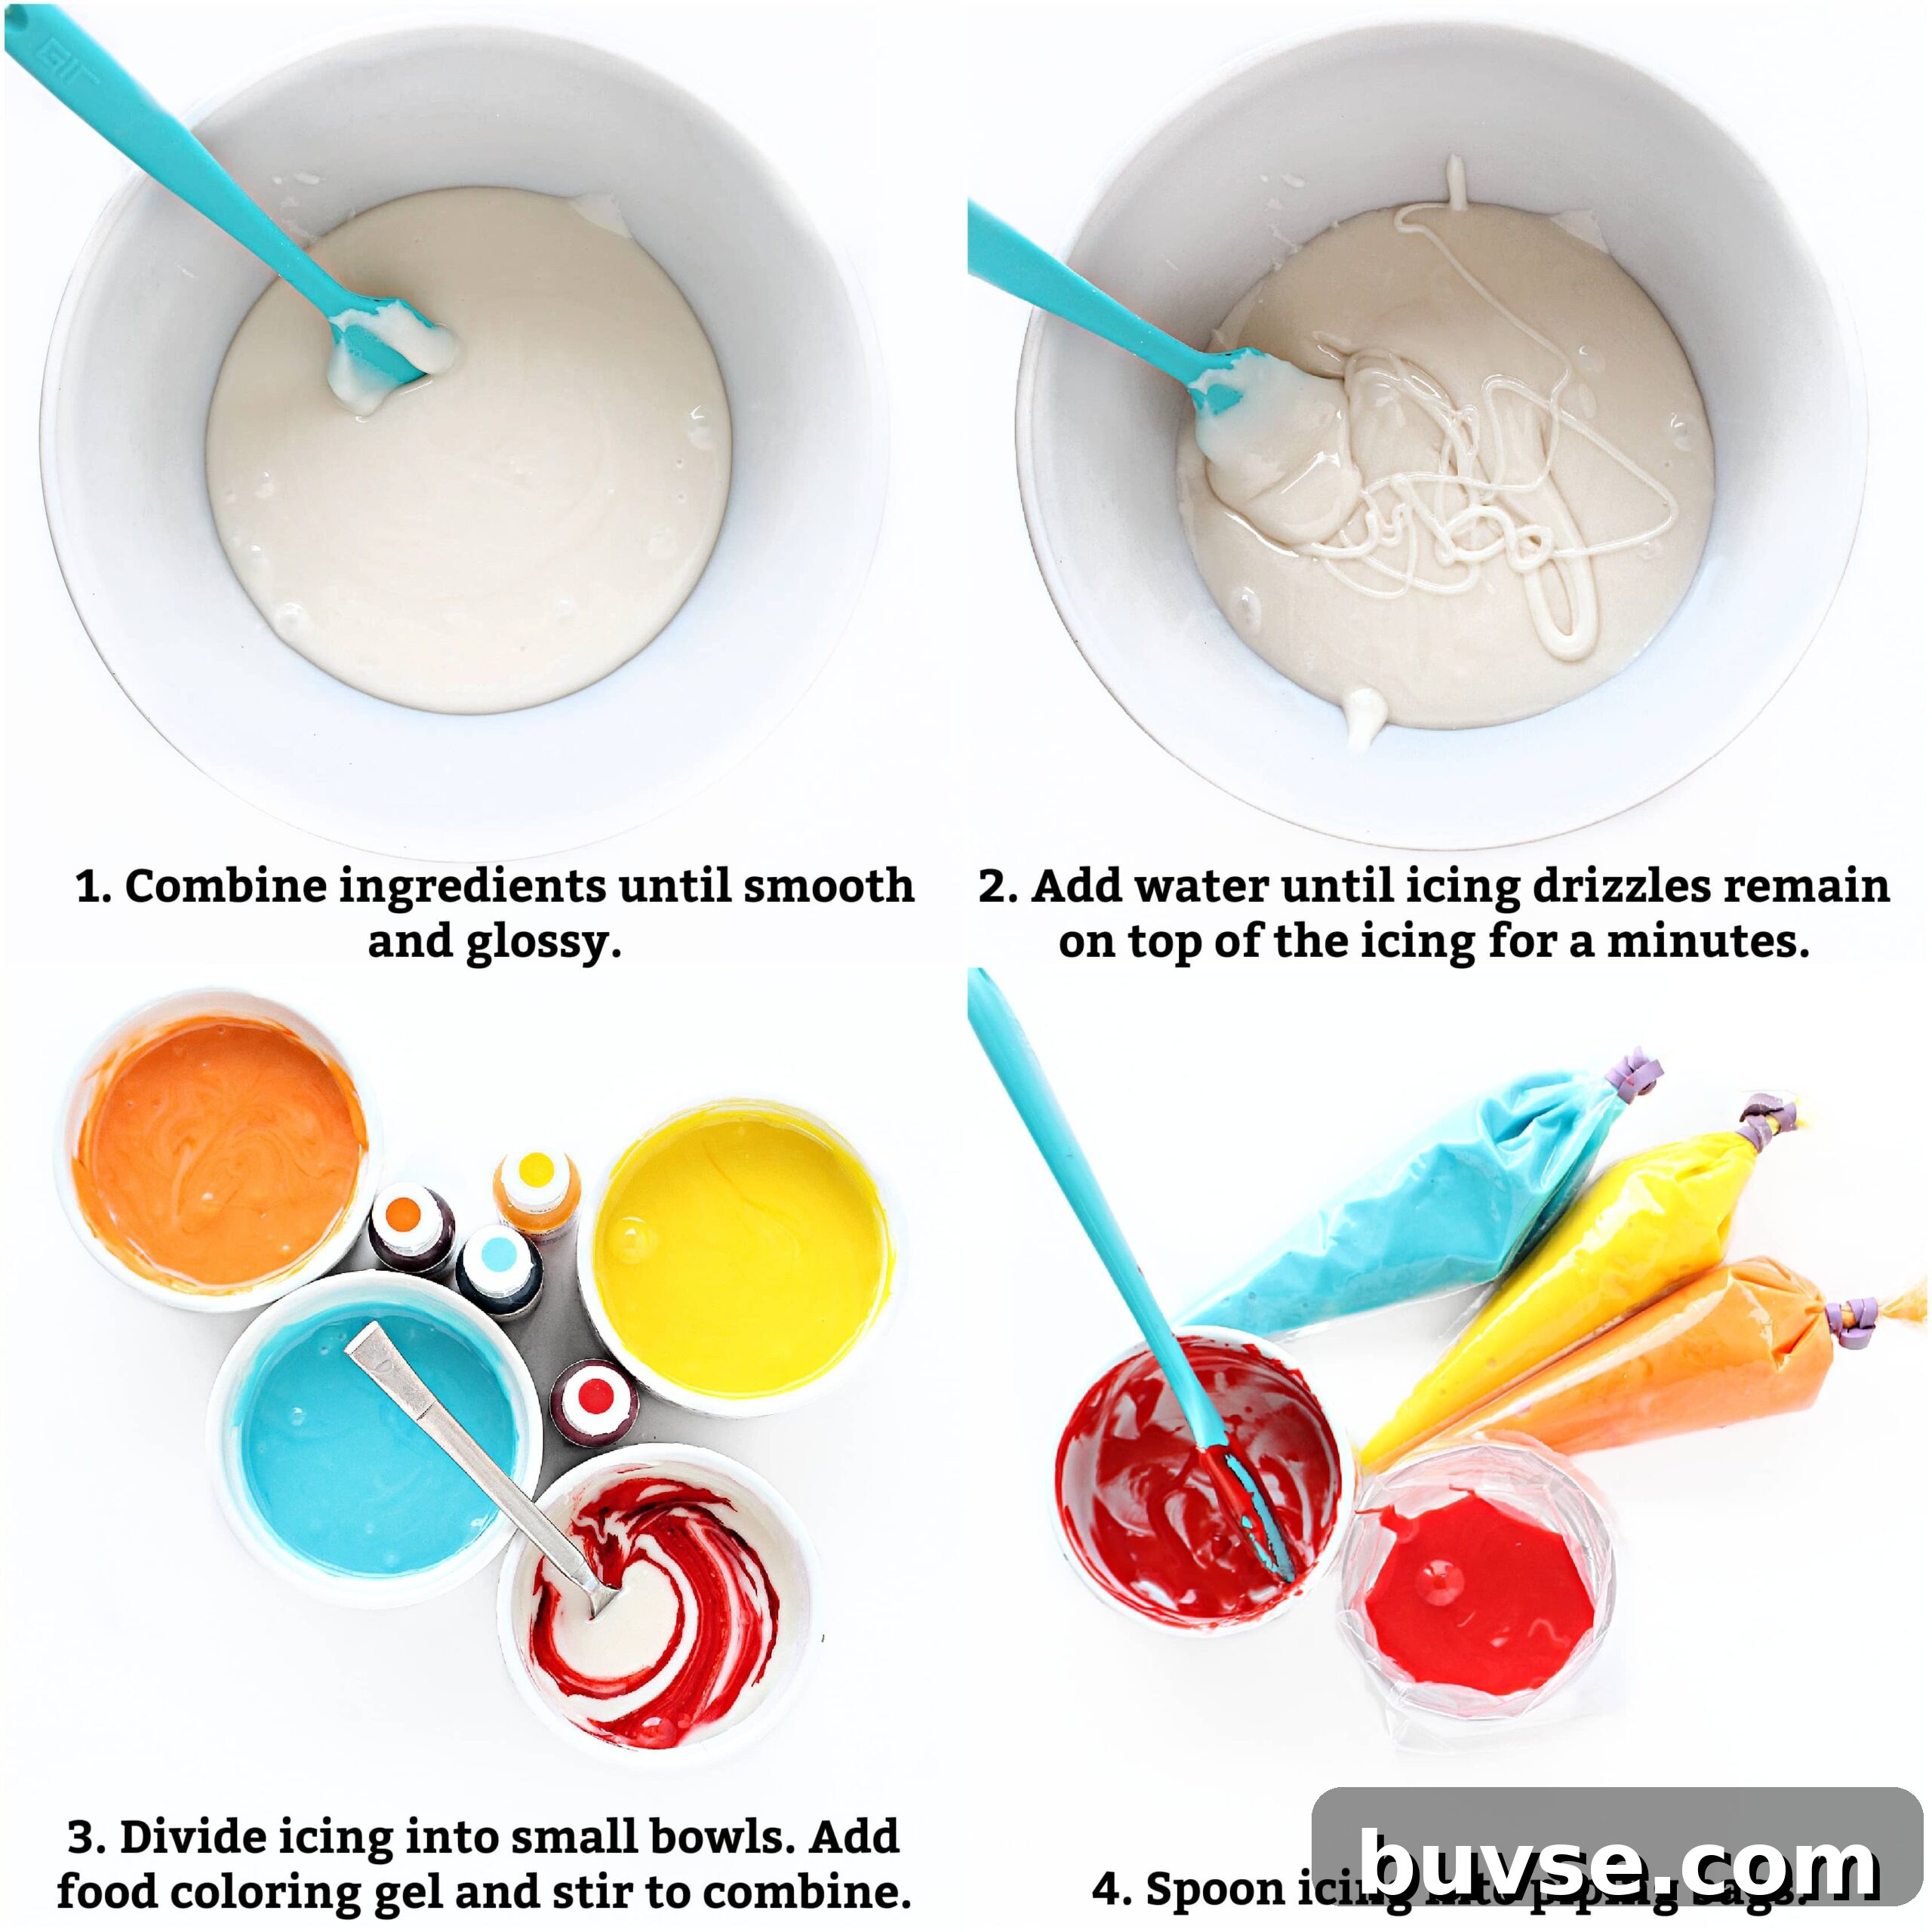
- In a medium bowl, combine confectioners’ sugar, corn syrup, vanilla, and most of the water. Stir until smooth and glossy.
- Add remaining water, a teaspoon at a time, until the glaze is the desired consistency—similar to honey or white glue for flooding.
- Divide the icing into small bowls to create different colors, stirring in gel food coloring until evenly blended.
- Transfer each color to a piping bag or small zip-top bag and close securely for use.
Storage
Prepared glaze icing stored in sealed bags can be kept in the refrigerator or at room temperature for up to two weeks. Give refrigerated bags a brief warm-up at room temperature and knead before piping if the icing has stiffened.
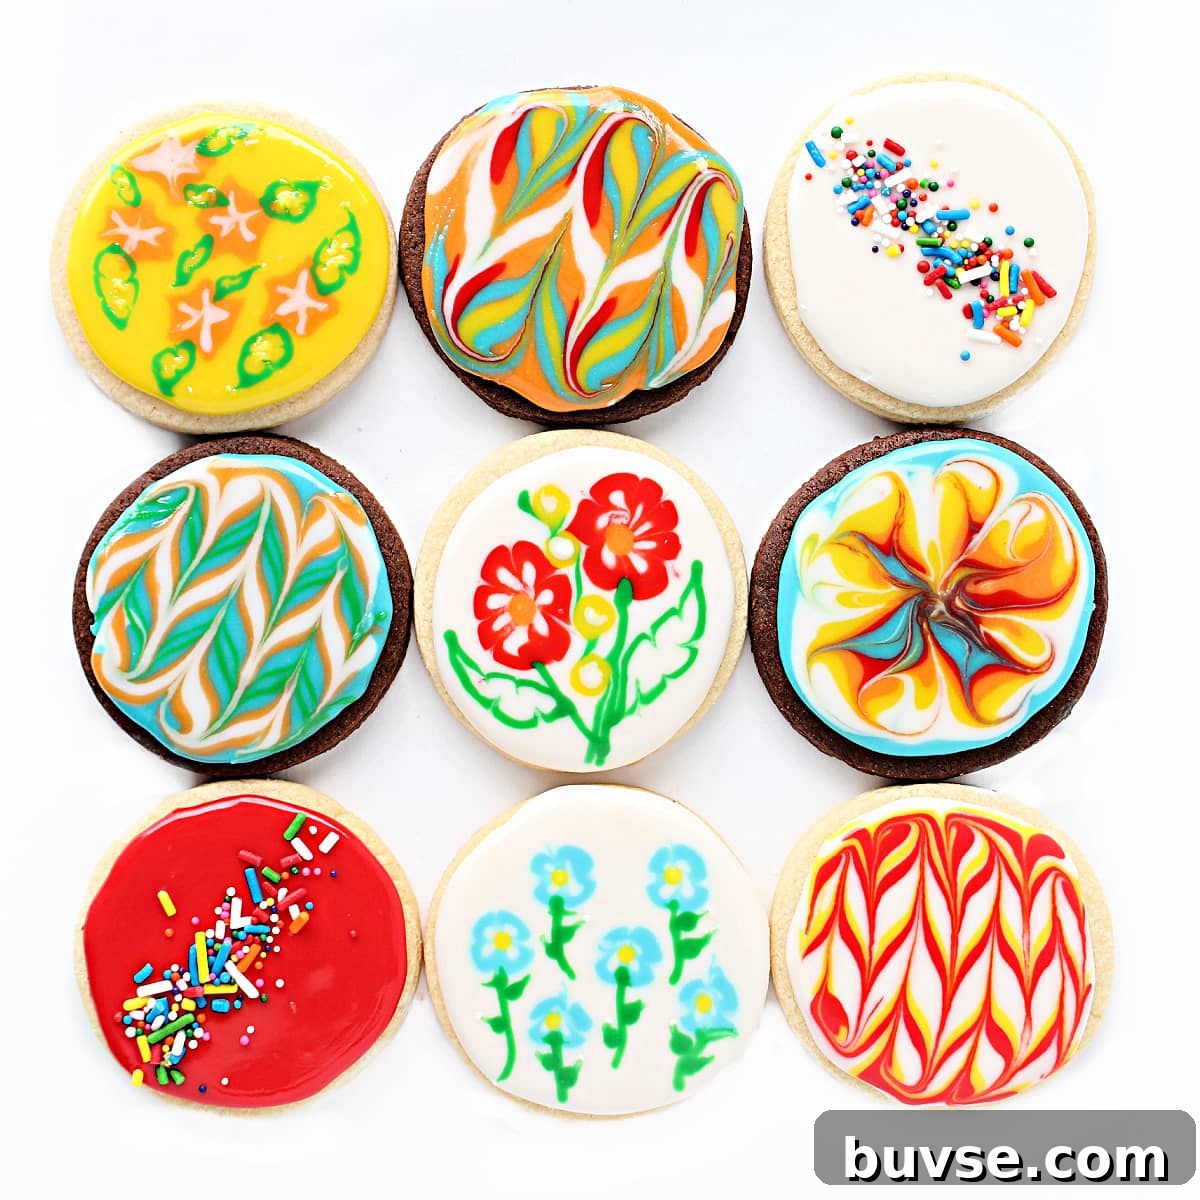
Tips
- Substitute water with milk or fruit juice for a subtle flavor change, using the same amount indicated in the recipe.
- Use gel food coloring for richer shades without changing consistency; a small amount goes a long way.
- Decorate one cookie at a time. For the smoothest finish, add any surface details while the flooded base is still wet.
- Tap each iced cookie gently on your work surface to release air bubbles; pop stubborn bubbles with a toothpick.
- To build dimension, pipe additional details on top of fully dried base icing.
- Sprinkles work best when applied to wet icing so they adhere securely.
- When the icing is fully dry (at least 12 hours), cookies can be stacked or packaged. For longest freshness, wrap cookies individually and store in an airtight container.
- Food coloring markers are useful for adding fine details after the icing has dried completely.
How to use glaze icing for easy cookie decorating
These simple techniques work for adults and children alike. All you need are piping bags (or zip-top bags) and a toothpick to create attractive designs.
Marbled design
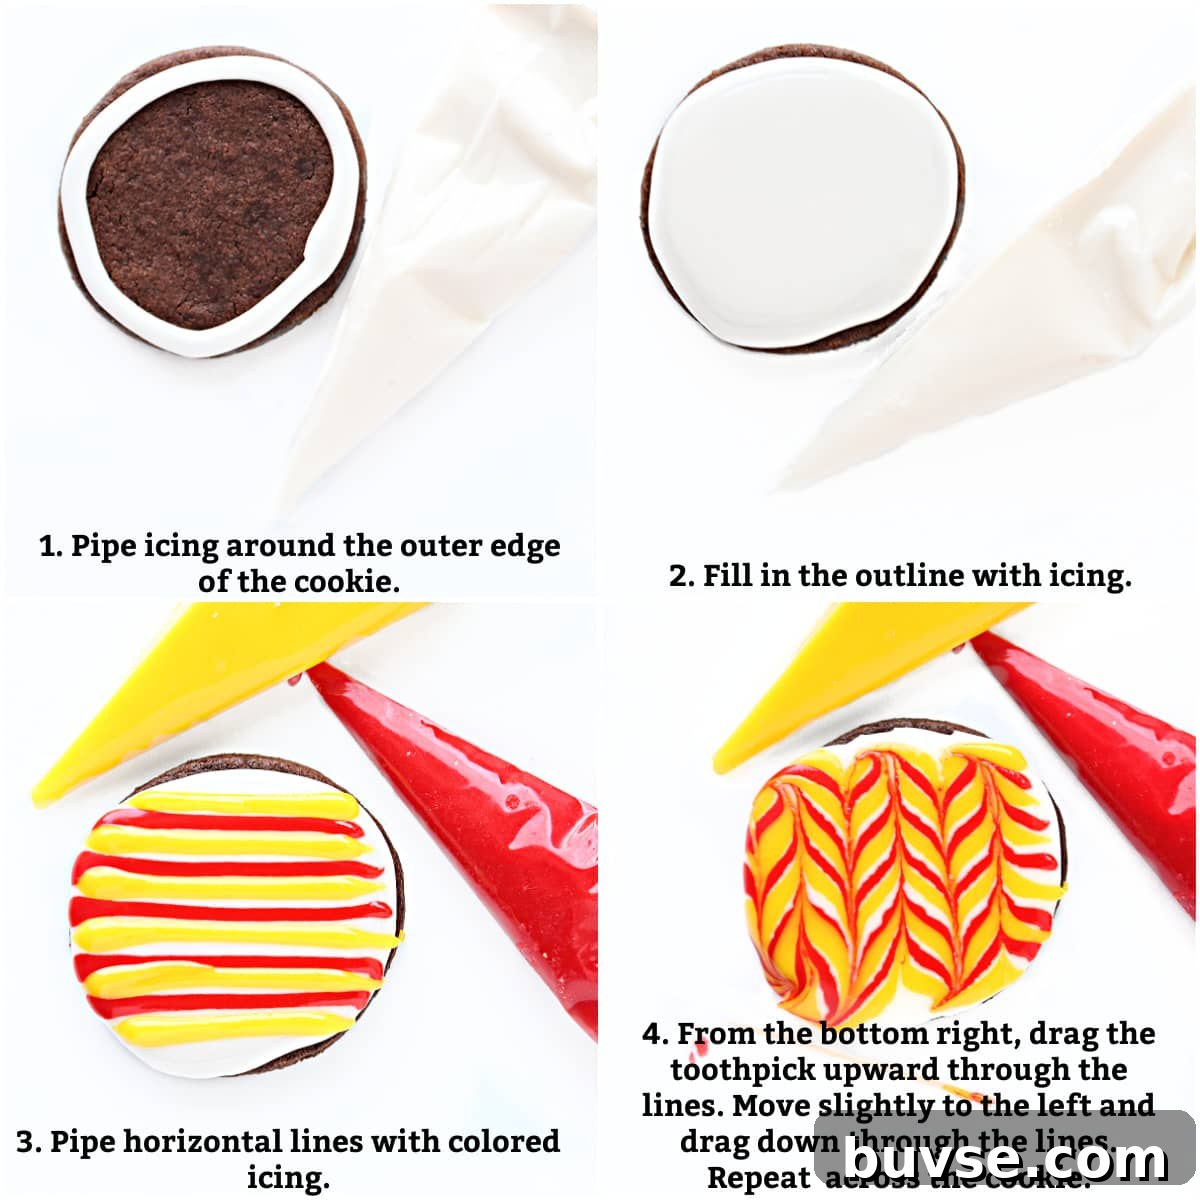
- Pipe an outline around the cookie with one color.
- Flood the interior with the same color.
- Pipe horizontal lines of contrasting colors across the flooded area.
- Drag a toothpick upward through the lines, then slightly to the side and drag downward, repeating to create a marbled effect.
Tie dye design
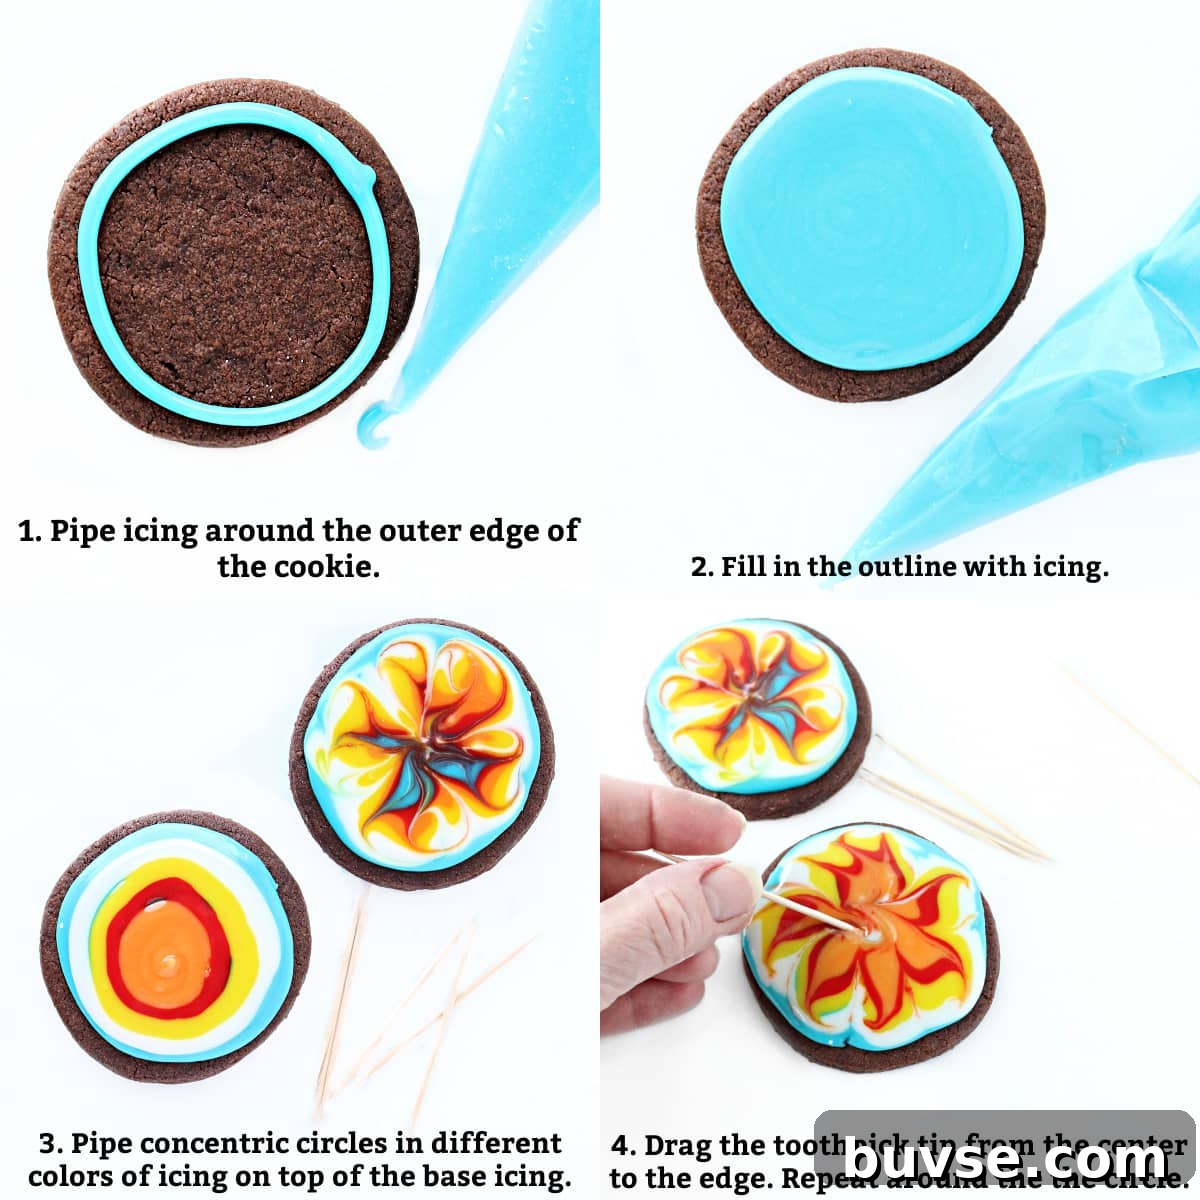
- Pipe an outline and flood the cookie with a base color.
- Pipe concentric rings of other colors from the edge toward the center.
- Drag a toothpick from the center to the edge, angling it slightly to create swirls; repeat around the cookie.
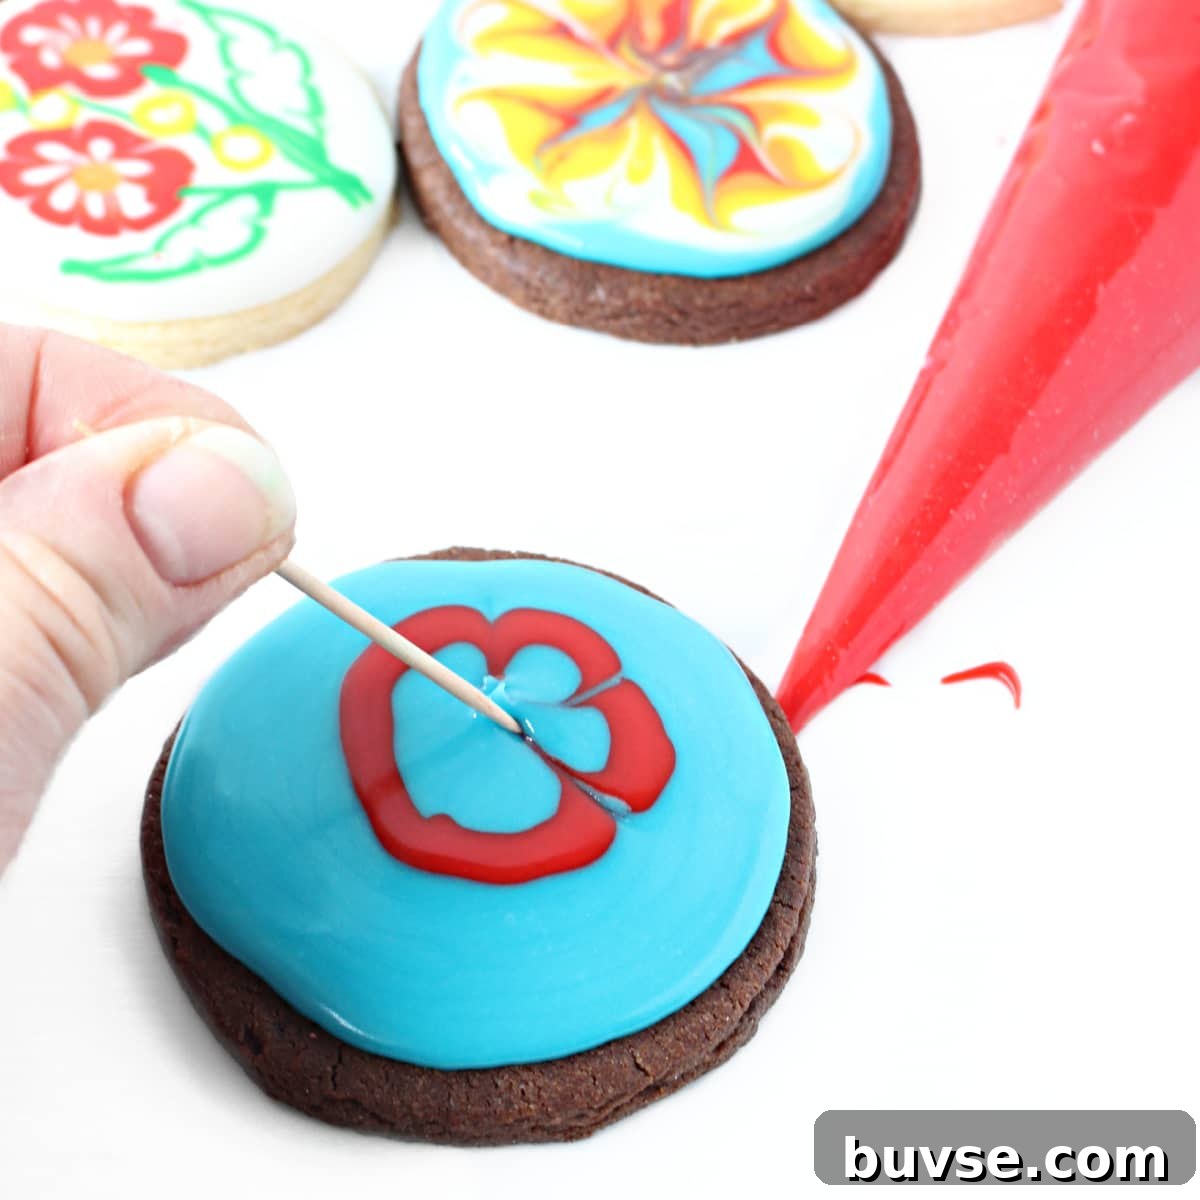
Flower design
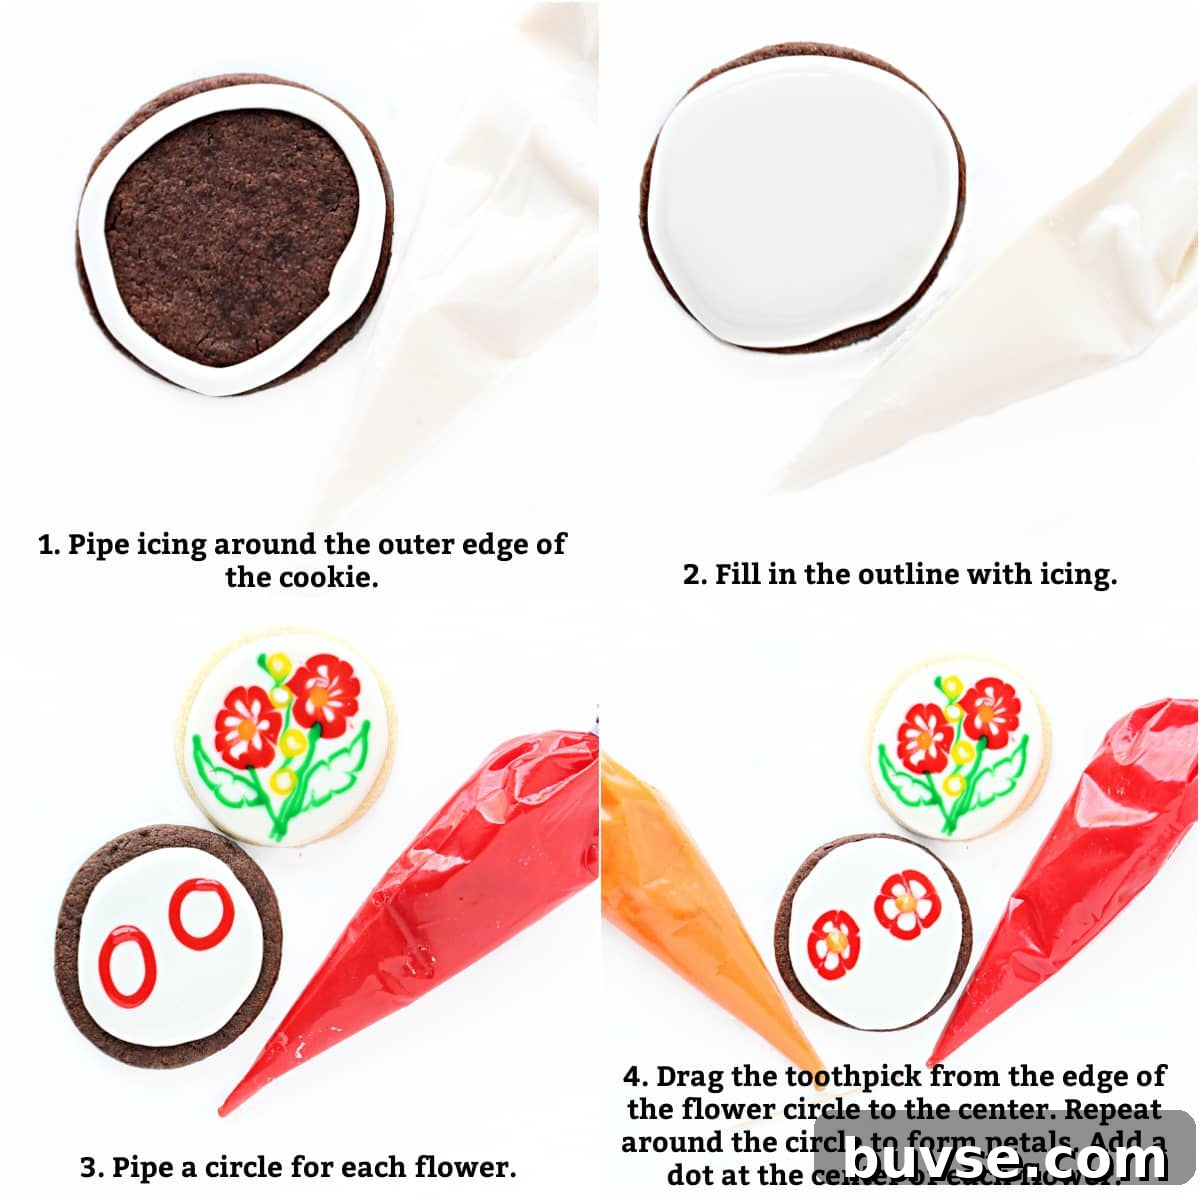
- Pipe the outline and flood the cookie in a base color.
- Pipe small circular outlines in a contrasting color onto the wet surface.
- Drag a toothpick from the edge of each circle to the center to form petals, then add a small dot of icing at the center of the flower.
Frequently asked questions
Royal icing is made with egg whites or meringue powder and dries hard and crunchy, which is ideal for crisp edges and fine piping. Glaze icing contains no egg whites and dries firm enough for stacking while keeping a softer, chewier texture and slightly softer edges.
You can substitute the vanilla in this recipe with one teaspoon total of any extract or flavoring of your choice, such as almond, lemon, or peppermint.
This batch yields about 1½ cups of icing, enough to ice roughly 25 cookies that are 2½ inches in diameter. Yield will vary with cookie size and decoration style.
Related Recipes
Lemon Slice Sugar Cookies — citrus-flavored cookies finished with lemon in the glaze.
Birthday Cake Cookies — stacked sugar cookies coated in glaze icing with a hidden candy surprise.
Decorated Grinch Cookies — themed sugar cookies using cookie sticks and simple icing techniques.
Cozy Mug Sugar Cookies — round cookies piped into mug shapes with cozy icing designs.
Gingerbread Pirate Cookies — gingerbread men decorated with colorful glaze to match illustrated characters.
Explore more decorated sugar cookie ideas in the recipe index on this site.

Glaze Icing Recipe
A simple glaze icing for cookies that is quick to mix, easy to color, and dries firm enough to stack while remaining soft to bite.
Prep Time: 15 minutes
Total Time: 15 minutes
Servings: About 25 (2½” cookies)
Calories: 59 kcal (per cookie, approximate)
Author: Wendy Sondov
Ingredients
- 4 cups confectioners’ sugar
- 3 tablespoons water (add more by teaspoon to adjust consistency)
- 3 tablespoons light corn syrup
- 1 teaspoon vanilla extract (or clear imitation vanilla for very white icing)
- Gel food coloring, as needed
- Optional: 8 drops white gel coloring for opacity
For chocolate glaze
- 2 tablespoons cocoa powder
- 2–3 drops brown gel food coloring (optional)
Instructions
- Place the confectioners’ sugar in a medium bowl. Add corn syrup, vanilla, and most of the water. Stir until smooth and glossy.
- Add additional water, a teaspoon at a time, until the icing reaches the ideal consistency for outlining and flooding (similar to honey).
- Divide the icing into bowls for coloring. Stir in gel colors until evenly combined.
- Let the icing rest a few minutes so bubbles rise. Spoon or pipe the icing into piping bags or small zip-top bags and seal.
- Decorate cookies, allowing at least 12 hours for the icing to fully dry before stacking or packaging.
Notes
- This recipe yields about 1½ cups of icing, enough for roughly 25 small cookies.
- Gel coloring gives stronger shades with minimal product and won’t thin the icing like liquid colors can.
- For best freshness: fully dry the icing, wrap cookies individually, and store in an airtight container.
Nutrition (approx.)
Calories: 59 kcal | Carbohydrates: 15 g | Protein: 0.1 g | Fat: 0.1 g | Sugar: 15 g