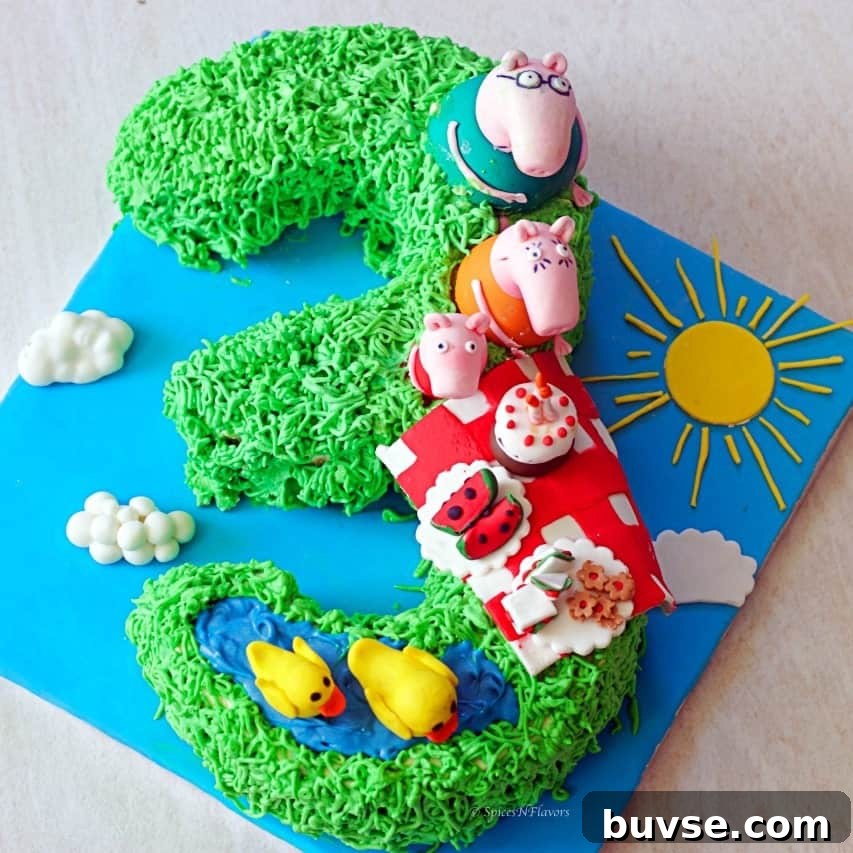
Peppa Pig Birthday Cake — a delightful design that wins over any little fan of the cheeky, lovable pig. This post walks you through a clear, practical method to create a number-shaped cake (specifically a number 3) using round cake layers rather than special number tins. The cake is filled and frosted with stabilized whipped cream, decorated with piped grassy textures and finished with fondant Peppa Pig toppers for a colourful park-themed celebration.
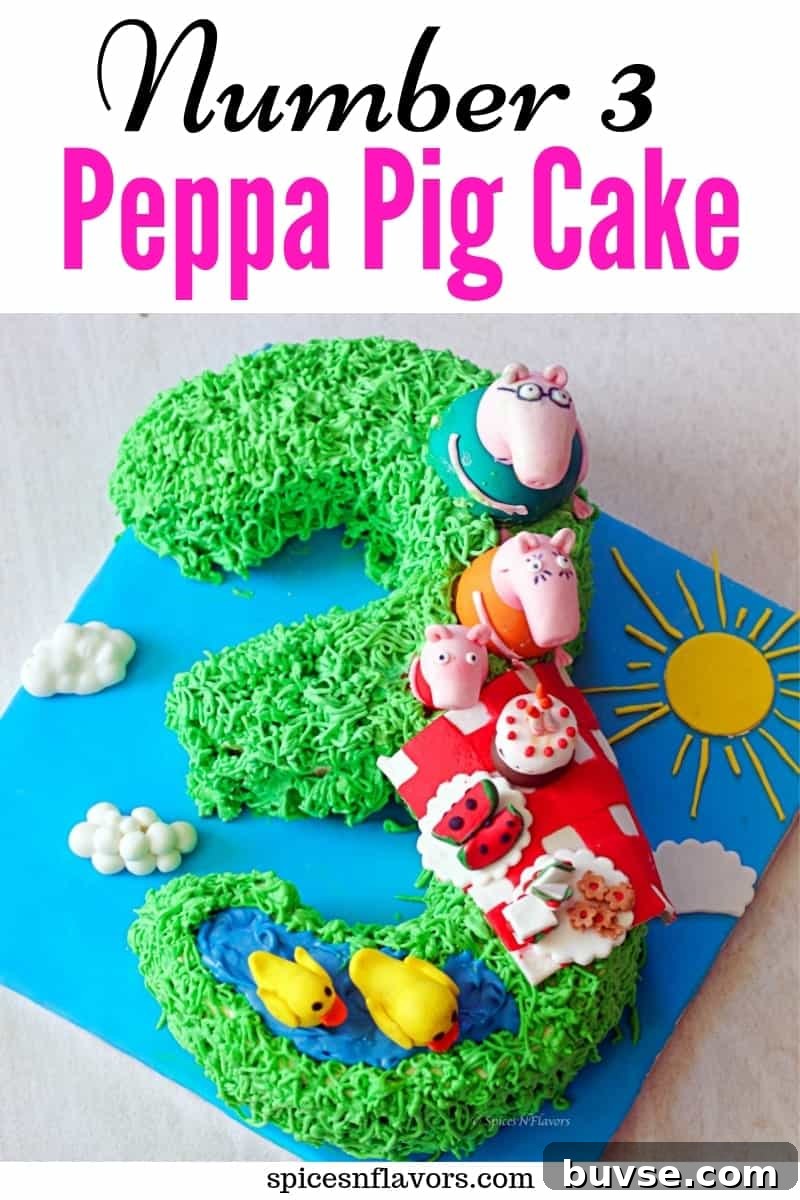
My daughter loves watching Peppa Pig, so for her birthday I combined three wishes in one cake: a Peppa Pig theme, her dad’s favourite pineapple flavour, and a number-shaped cake design. I used my eggless pineapple cake recipe as the base and adapted it into a six-layer number 3 cake, decorated to look like a picnic in the park with a small pond, grass, sun and clouds.
What you’ll learn in this Peppa Pig birthday cake tutorial
- How to layer round cakes and crumb coat for a stable base.
- How to transform round layers into a number 3 shape without special pans.
- Which piping tips work best for grassy textures and tight corners.
- How to prepare simple fondant toppers for Peppa, Mummy and Daddy Pig and other accents.
- How to cover a cake board with fondant to match your theme.
For clarity, I organized the process into six steps. Follow them in order for a smoother build and assembly.
Step 1: Layering and crumb coating
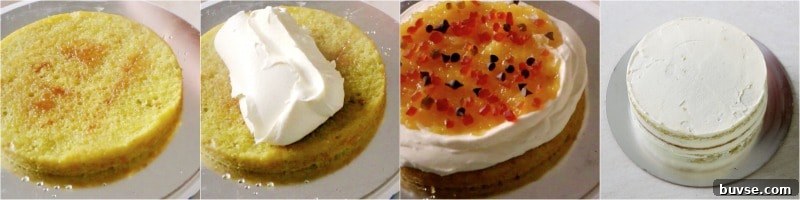
I baked two 7-inch pineapple cakes and sliced each into three even layers, giving six layers in total. Place the bottom layer on your cake board, then add stabilized whipped cream, pineapple compote, tutti frutti and chocolate chips between layers. Repeat until the stack is complete. Use the same whipped cream to apply a thin crumb coat around the whole cake and chill for at least 30 minutes to firm up before shaping.
Pro tip: Work on both cake stacks side by side and perform each step for both cakes simultaneously — it saves a lot of time and keeps layers consistent.
Step 2: Cover the cake board with fondant
Covering the cake board in fondant creates a clean, themed base that ties the whole cake together. For this park scene, I rolled sky-blue fondant to fit the board and draped it over, gently tucking the edges underneath. This gives a tidy finish and helps the cake sit on a coordinated background. Alternatively, you can finish the board edge with ribbon if you prefer. Allow the covered board to set so it stays smooth when you place the cake on it.
Step 3: Shape the round cakes into a number 3
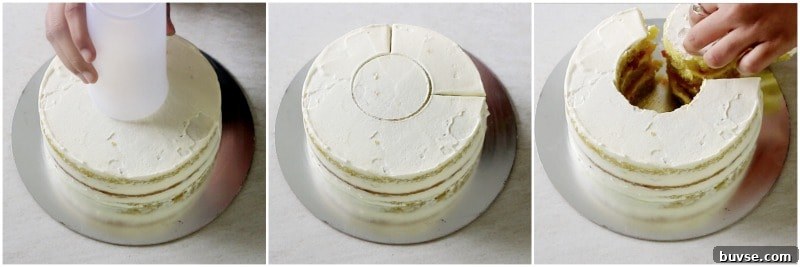
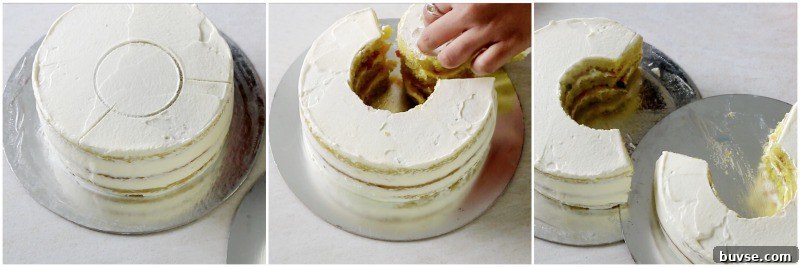
Cutting round cakes into the number 3 is easier to follow visually, so I made a simple diagram to guide the cuts. Arrange the cut pieces on the covered cake board to form a continuous number 3 shape. Use chilled layers for cleaner cuts and minimal crumbs.
Step 4: Decorating the cake
To create the grassy park surface, use a grass piping tip (Wilton nozzle 233 works well) with green-coloured stabilized whipped cream, lightly scented or flavored with pineapple for continuity of taste. Pipe grass generously across the cake. For tight curves and inside areas that are hard to reach with the grass tip, use a small round tip and apply short random strokes to fill gaps — the effect still reads as grass from a distance and adds texture.
Step 5: Making a small pond
For a simple water feature, melt white chocolate and tint it very lightly with blue gel food colour and a few drops of neutral oil to make it glossy and pourable. Pipe or draw the shape of a small pond onto parchment, let it set slightly, then place it on the cake where desired. You can also make a shallow puddle instead if you prefer, and position Peppa and family nearby.
Step 6: Fondant toppers and final placements
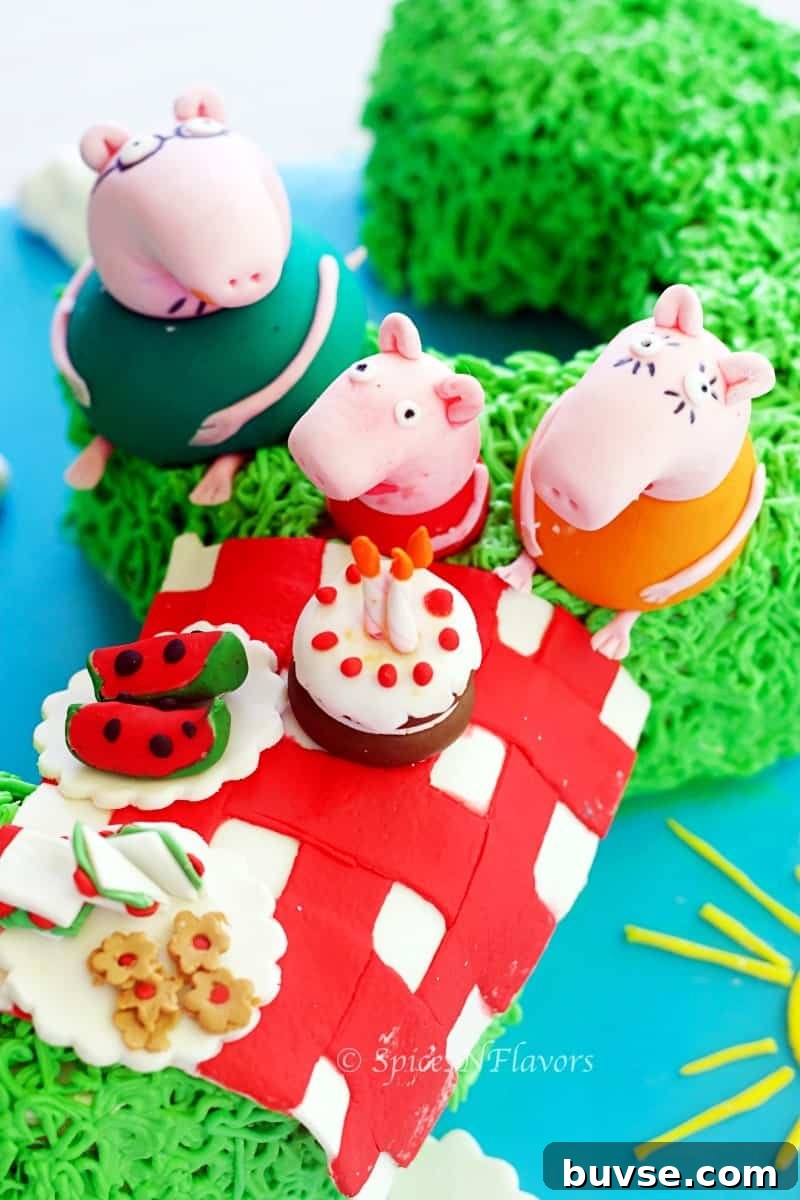
I made simple fondant figures for Peppa, Mummy and Daddy Pig, plus ducks, snacks, sun and clouds. If you’re new to fondant modelling, start with basic shapes: circles for bodies, small flattened pieces for ears and snouts, and use edible glue to attach layers. The sun is easiest made by cutting a circle and adding thin strips for rays. Place the figures and props gently on the grass and board to complete the park scene.
There are plenty of video tutorials and cake-decorating demonstrations available online that show step-by-step fondant modelling and chocolate melting techniques if you want more visual guidance.
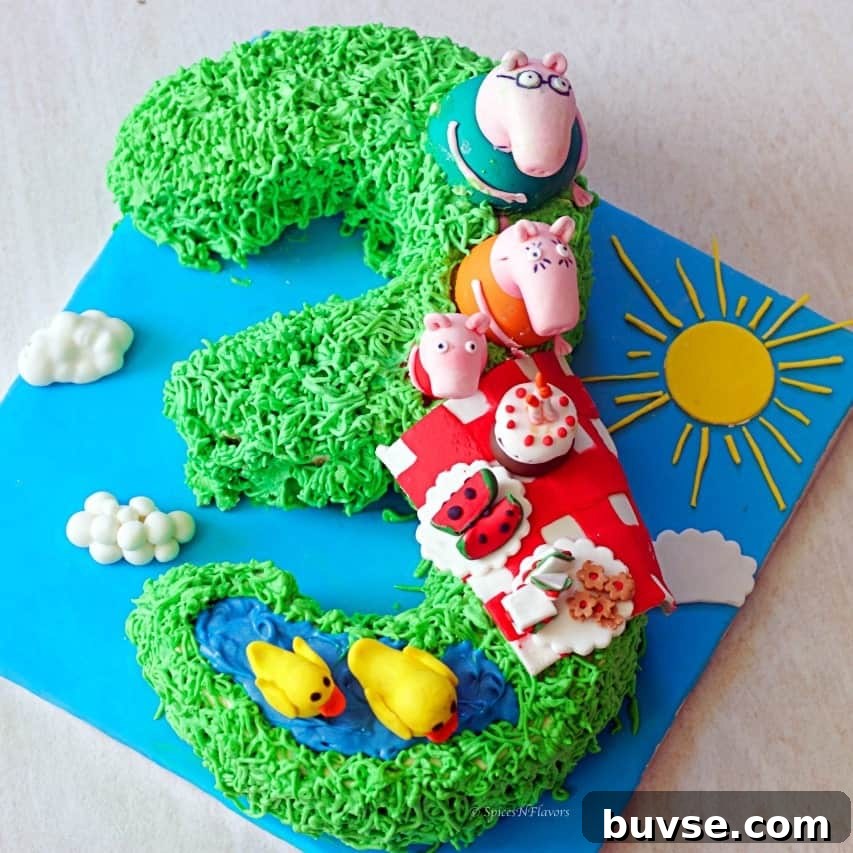
This Peppa Pig birthday cake takes time and some practice, but the result is a joyful, personalised centrepiece that makes a child’s birthday extra special. Whether you use pineapple cake, vanilla, chocolate or another flavour, the method for shaping, crumb coating, board covering and decorating remains the same.
Creating this cake was a personal project for my daughter, a memory I hope she keeps. If you recreate a similar cake, take photos and share your experience — homemade birthday cakes are always worth the effort.
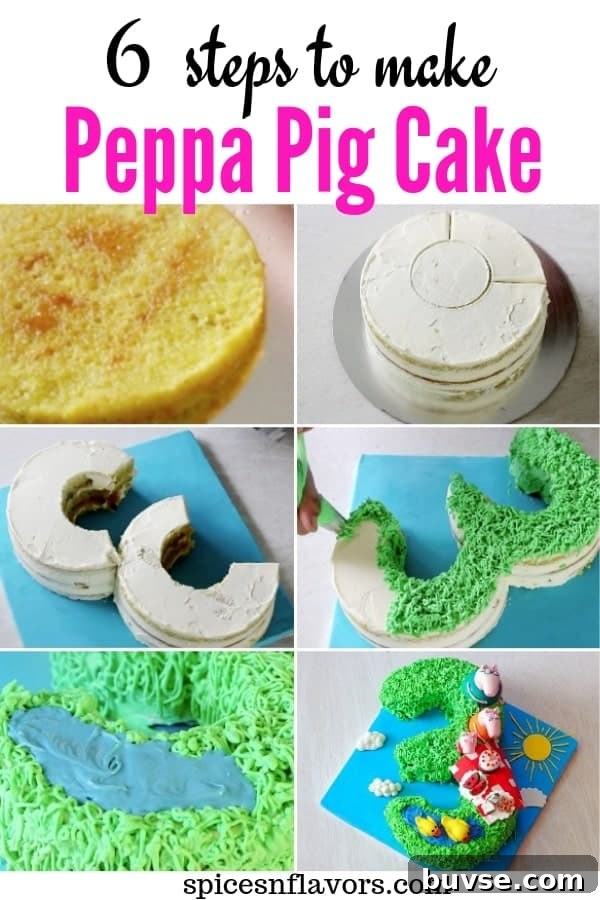
See you soon with another cake idea. Until then, hugs — Sushma.